t4 install manual

Welcome to the T4 Install Manual! This guide provides step-by-step instructions for installing and configuring your Honeywell T4 Pro Programmable Thermostat. Designed for ease of use, it ensures a smooth setup process for both installers and homeowners, covering everything from wiring to advanced features.
1.1 Overview of the T4 Thermostat
The Honeywell T4 Pro Programmable Thermostat is a user-friendly device designed to efficiently manage your home’s heating and cooling systems. It offers programmable scheduling, smart features, and compatibility with various HVAC configurations. With its intuitive interface, the T4 thermostat ensures easy operation while providing precise temperature control. This thermostat is ideal for homeowners seeking energy savings and advanced functionality, supported by a comprehensive guide for seamless installation and maintenance.
1.2 Importance of Proper Installation
Proper installation of the T4 thermostat is crucial for optimal performance, efficiency, and functionality. Incorrect wiring or setup can lead to system malfunctions, energy inefficiency, and safety hazards. Following the installation manual ensures compatibility with your HVAC system, accurate temperature control, and seamless integration of smart features. A well-installed thermostat enhances energy savings, comfort, and longevity of the device, making it essential to adhere to the provided guidelines carefully.
System Requirements and Pre-Installation Checks
Before installing the T4 thermostat, ensure your HVAC system is compatible and verify electrical requirements. Check existing wiring configurations and system specifications to avoid installation issues. Proper planning ensures efficient setup and functionality. Consult the manual for detailed compatibility lists and required tools to streamline the process.
2.1 Compatibility with HVAC Systems
The Honeywell T4 Pro thermostat is compatible with a wide range of HVAC systems, including forced air, hydronics, and heat pumps. It supports standard 24V AC systems and is designed to work seamlessly with most conventional heating and cooling setups. Ensure your system matches the voltage and wiring requirements specified in the manual. Compatibility with multi-stage systems and geothermal units is also supported, offering flexibility for various home configurations. Verify your system type before proceeding with installation.
2.2 Tools and Materials Needed
To install the Honeywell T4 Pro thermostat, you’ll need a Phillips screwdriver, flathead screwdriver, wire strippers, drill, pliers, wire nut tool, voltage tester, electrical tape, wire connectors, and a level. Additional materials may include wall anchors or a ladder. Ensure all tools are accessible and you’re comfortable using them. Consult the manual or online tutorials if unsure, and always prioritize safety by using a voltage tester to check for power.

Mounting the T4 Thermostat
Align the mounting plate with the wall, ensuring it is level. Secure it using screws provided. Tighten firmly with a screwdriver for a stable base.
3.1 Removing the Old Thermostat
Before installing the T4, ensure the power to your HVAC system is turned off. Gently pull the old thermostat away from the wall to access the wiring. Disconnect the wires from their terminals, taking note of their labels for future reference. Remove any screws holding the old thermostat in place. If the thermostat uses batteries, take them out before discarding the unit. This ensures a safe and clean installation process for the new T4 thermostat.
3.2 Installing the Mounting Plate
Turn off the power to your HVAC system before proceeding. Remove the old thermostat and any remaining adhesive. Clean the wall surface to ensure proper adhesion. Align the T4 mounting plate with the wall anchors, ensuring it is level. Secure the plate using the provided screws. Gently press the plate against the wall until it clicks into place. Make sure the plate is snug and even before moving on to the next steps. This ensures a stable base for your new thermostat.
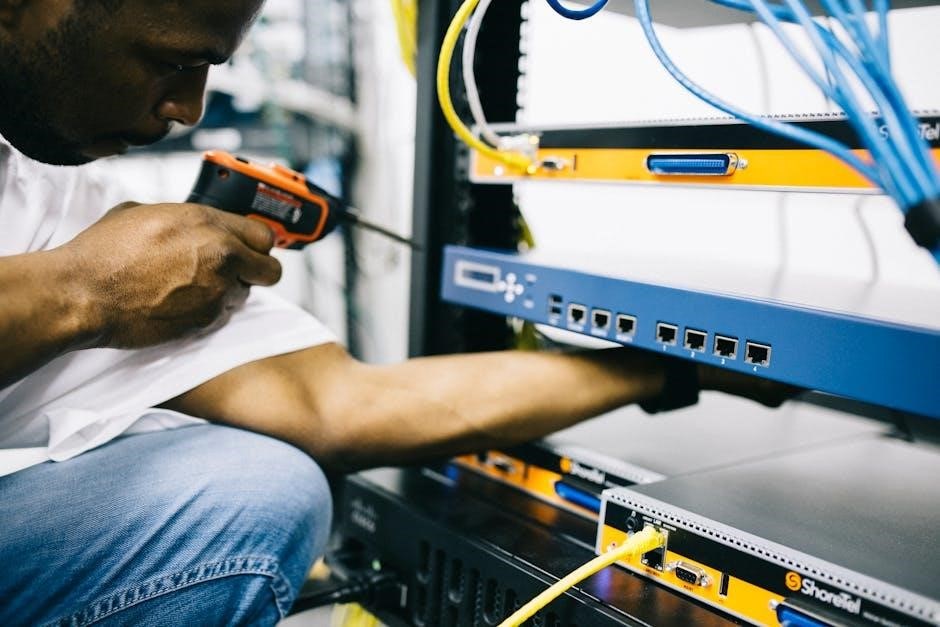
Wiring Configuration for T4 Thermostat
Correct wiring is essential for proper thermostat function. Identify terminals (R, W, Y, G, C) and connect wires according to your HVAC system requirements. Refer to the manual for specific configurations and ensure all connections are secure before proceeding.
4.1 Understanding Wiring Terminals (R, W, Y, G, C)
Understanding the wiring terminals is crucial for a successful installation. The terminals are labeled as follows: R (24V power), W (heating), Y (cooling), G (fan), and C (common). Each terminal corresponds to a specific function in your HVAC system. Proper identification ensures that the thermostat controls your heating, cooling, and fan operations effectively. Always refer to your system’s wiring diagram and the T4 manual for accurate connections. Incorrect wiring can lead to system malfunctions or safety hazards. Ensure all wires are securely connected to avoid loose contacts, which can cause intermittent issues. If unsure, consult a professional to avoid potential damage or safety risks. This step is foundational for the thermostat’s operation, so it’s essential to get it right.
4.2 Connecting Wires to the T4 Thermostat
Connecting wires to the T4 thermostat requires careful attention to ensure proper system functionality. Begin by turning off the power to your HVAC system at the circuit breaker. Remove the old thermostat and connect the wires to the corresponding terminals on the T4 mounting plate. Match each wire to its designated terminal (R, W, Y, G, C) based on your system’s wiring diagram. Secure the wires firmly to avoid loose connections. Once all wires are connected, align the T4 Pro thermostat with the mounting plate and snap it into place. Double-check all connections for accuracy and ensure the thermostat is level. Turn the power back on and test the system to confirm everything is working correctly. Proper wiring is essential for safe and efficient operation. Always follow safety guidelines to avoid electrical hazards. If unsure, consult a licensed professional for assistance. This step ensures your thermostat controls your HVAC system effectively and reliably.

Initial Setup and Configuration
After installation, power on the T4 thermostat. The display will light up, prompting you to set basic parameters like date, time, and temperature preferences. Use the navigation buttons to scroll through options. Press “Select” to confirm settings. Ensure all system settings match your HVAC configuration. Follow on-screen instructions to complete the initial setup process. This step ensures your thermostat operates efficiently from the start. Proper configuration is crucial for optimal performance.
5.1 Powering On the Thermostat
After completing the wiring connections, ensure the HVAC system’s power is turned on at the circuit breaker. The Honeywell T4 Pro Thermostat will automatically power on. If it doesn’t activate, verify that all wires are securely connected to the correct terminals (R, W, Y, G, C). Check for any loose connections or incorrect wiring configurations. If issues persist, consult the troubleshooting guide or contact a licensed professional for assistance.
5.2 Navigating the Menu System
Power on the thermostat and use the center button to access the menu. Navigate through options using the up and down arrows. Press ‘Select’ to choose a menu item. Use the arrows to adjust settings and ‘Select’ to confirm. Access advanced features by pressing and holding the center button to enter Installer Setup (ISU). Use the same navigation method to configure system parameters and exit by holding the center button until the menu closes.
Installer Setup (ISU) Options
Access advanced settings by pressing and holding the center button. Configure system parameters like temperature limits, fan settings, and HVAC compatibility to customize the thermostat for specific systems.
6.1 Accessing Advanced Settings
To access advanced settings, press and hold both the Center and Select buttons for approximately three seconds. This will navigate you to the advanced menu. From here, use the Select button to enter Installer Setup (ISU) mode. Once inside, you can adjust various system parameters such as temperature limits, fan operation, and HVAC compatibility settings. These adjustments ensure optimal performance tailored to your specific heating and cooling system requirements.
6.2 Configuring System Parameters
In Installer Setup (ISU) mode, configure system parameters to optimize performance. Adjust temperature limits, fan operation, and HVAC compatibility settings. Set heating and cooling differential temperatures, cycle rates, and fan auto-on times. Ensure proper configuration to match your system type, such as forced air or hydronics. These settings fine-tune the thermostat’s operation, enhancing efficiency and comfort. Refer to the manual for specific parameter ranges and recommendations tailored to your HVAC system requirements.

Programming the T4 Thermostat
Program your T4 thermostat to create custom schedules, optimizing comfort and energy savings. Set daily temperature preferences, enable smart features, and adjust settings for efficiency and convenience.
7.1 Setting Up Daily Schedules
Setting up daily schedules on your T4 thermostat allows you to customize temperature settings for different times of the day. Start by accessing the menu, then select the schedule option. Choose the days you want to program and set the desired temperatures for wake, leave, return, and sleep periods. This feature helps optimize energy usage while maintaining comfort. Save your settings to ensure the schedule runs automatically, adjusting temperatures precisely when needed.
7.2 Enabling Smart Features
Enable smart features on your T4 thermostat to enhance energy efficiency and convenience. Access the menu, navigate to settings, and select smart features. Options like geofencing and smart recovery can be activated here. Geofencing adjusts temperatures based on your location, while smart recovery learns your system’s behavior to reach setpoints efficiently. Ensure your thermostat is connected to Wi-Fi for these features to function. Refer to the manual for specific button sequences and app integration details if required.
Troubleshooting Common Issues
Identify and resolve common issues like temperature inaccuracies or unresponsive screens. Check wiring connections, sensor calibration, and power supply. Restart the system or reset settings if necessary.
8.1 Resolving Wiring Issues
Wiring issues are common during installation. Verify all connections match the terminal designations (R, W, Y, G, C). Check for loose wires or incorrect terminals. If the thermostat doesn’t power on, ensure the HVAC system is properly connected. Consult the wiring diagram in the manual or contact a professional if unresolved. Proper wiring ensures safe and efficient operation of your T4 thermostat.
8.2 Fixing Display or Connectivity Problems
If the display is unresponsive or connectivity issues arise, restart the thermostat by turning it off and on. Ensure proper power supply and check for loose wires. Reset the device to factory settings if necessary. For connectivity issues, verify Wi-Fi network settings and ensure the thermostat is connected to the correct network. Update firmware to the latest version for optimal performance. Consult the troubleshooting guide for advanced solutions if problems persist.

Maintenance and Upkeep Tips
Regularly clean the thermostat display and sensors to ensure accuracy. Replace batteries as needed and check wiring connections for stability. Schedule annual HVAC system checks to maintain optimal performance.
9.1 Cleaning the Thermostat
Cleaning your T4 thermostat is essential for maintaining accuracy and functionality. Use a soft, dry cloth to gently wipe the display and exterior surfaces. Avoid harsh chemicals or liquids, as they may damage the device. For internal components, turn off power and carefully vacuum dust from vents. Regular cleaning prevents malfunctions and ensures precise temperature control and energy efficiency. Always refer to the manual for specific care instructions.
9.2 Updating Firmware
Regular firmware updates ensure your T4 thermostat operates at peak performance. Check for updates via the thermostat’s menu or through the Honeywell Home app. Connect to Wi-Fi and follow on-screen instructions to download and install the latest version. Alternatively, download updates from Honeywell’s website to a USB drive and transfer them to the thermostat. Updating firmware enhances security, adds features, and improves overall functionality, ensuring optimal heating and cooling control.
Completion of this manual ensures your T4 thermostat is installed and configured correctly. Refer to Honeywell’s support resources for further assistance and troubleshooting.
10.1 Final Checks After Installation
After completing the installation, power on the thermostat and ensure the display lights up. Test heating and cooling modes to confirm proper operation. Check that schedules and smart features are enabled. Verify connectivity to Wi-Fi if applicable. Review all settings to ensure they match your preferences. Refer to the manual for troubleshooting common issues. If any problems persist, contact Honeywell’s customer support for assistance.
10.2 Resources for Further Assistance
For additional support, visit the Honeywell Home website for comprehensive guides and FAQs. Contact Honeywell’s customer service at 1-800-645-7490 or via email at customersupport@honeywell.com. Community forums and YouTube tutorials also offer troubleshooting tips and installation advice. Download the full T4 Pro manual from Honeywell’s official site for detailed instructions and advanced features.