knife sharpening angle guide for whetstone

Knife sharpening with a whetstone is an essential skill for achieving razor-sharp edges. It requires understanding proper angles‚ grit selection‚ and technique to maintain knife efficiency and longevity.
1.1 Importance of Proper Angle in Sharpening
The proper angle is critical for effective sharpening‚ as it ensures consistent edge formation and prevents damage. Incorrect angles can lead to a dull or uneven edge. Using a marker to check progress helps maintain precision. Sharpening at the wrong angle reduces the knife’s sharpness and longevity. Always match the angle to the knife’s design and intended use for optimal results. Proper angle technique is foundational for achieving razor-sharp edges consistently.
Understanding the Basics of Whetstone Sharpening
Whetstone sharpening involves using a flat stone to sharpen knife edges by stroking the blade. Proper angle‚ grit‚ and consistent strokes are key for achieving sharpness.
2.1 What is a Whetstone and How Does it Work?
A whetstone is a flat‚ abrasive tool used to sharpen knife edges. It works by stroking the blade against its surface‚ removing metal particles to create a sharp edge. Whetstones come in different types‚ such as water stones‚ oil stones‚ and ceramic stones‚ each with varying grit levels for coarse or fine sharpening. The stone’s abrasive particles grind the knife’s edge‚ refining it to achieve desired sharpness and precision.
2.2 Choosing the Right Grit for Your Whetstone
Choosing the right grit for your whetstone is crucial for effective sharpening. Coarse grits (e.g.‚ 1000-1500) are ideal for repairing dull or damaged blades‚ while finer grits (e.g.‚ 6000-8000) polish the edge for razor-sharpness. Start with a coarse grit to remove metal and progress to finer grits for refinement. Using a marker on the blade can help track progress and ensure even sharpening across the edge‚ making the process more efficient and precise for achieving desired results.

Determining the Correct Sharpening Angle
Determining the correct sharpening angle is vital for achieving sharpness. Most knives require angles between 17-20 degrees. Consistency ensures sharpness and edge durability.
3.1 How to Measure the Optimal Angle for Your Knife
To measure the optimal angle‚ start by identifying your knife’s bevel. Use a protractor or marker to mark the edge at the desired angle‚ typically between 15-20 degrees. For most knives‚ 20 degrees is ideal for chef knives‚ while 15 degrees suits sushi knives. Place the knife on the whetstone‚ aligning the marked edge with the stone’s surface. Adjust the knife’s position until the blade rests evenly‚ ensuring consistency across strokes. Incorrect angles can lead to a dull or uneven edge‚ so precision is key for sharpness and longevity.
3.2 Common Angles for Different Types of Knives
Common angles vary based on knife type and usage. Chef knives typically use a 20-degree angle for versatility‚ while sushi knives often use a sharper 15-degree angle. Cleavers and heavy-duty knives may use a steeper 25-30 degrees for durability. Pocket knives and utility knives generally range between 20-25 degrees. These angles balance sharpness and edge retention‚ ensuring optimal performance for their intended tasks; Personal preference may slightly adjust these standards‚ but they serve as reliable guidelines for most users.
Preparing Your Knife for Sharpening
Ensure the knife is clean‚ dry‚ and free from debris. Set up a stable workspace with proper lighting to facilitate effective sharpening.
4.1 Inspecting the Blade for Dullness
Inspecting the blade for dullness is crucial before sharpening. Check if the knife struggles to slice through soft materials like tomatoes or paper. A dull blade will tear rather than cut cleanly. Visually examine the edge for nicks or unevenness. Use a permanent marker to mark the edge; a dull knife will retain the mark‚ indicating where sharpening is needed. This step ensures you address only the necessary areas‚ making the sharpening process more efficient and effective.
4.2 Setting Up Your Sharpening Workspace
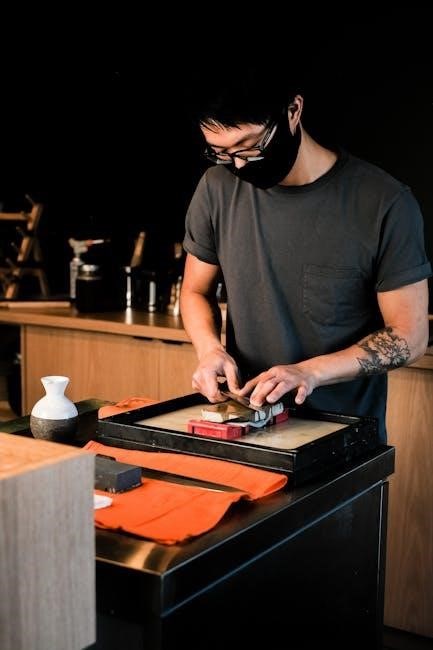
Setting up a proper sharpening workspace is essential for effective knife sharpening. Ensure a stable‚ flat surface and good lighting to maintain consistency. Position the whetstone on a non-slip base or damp cloth to prevent movement. Soak the stone in water or oil as required. Keep the area clean‚ organized‚ and free from distractions. Organize your tools within easy reach to streamline the process. Wear gloves and protective eyewear for safety. A well-prepared workspace helps maintain focus and achieves better sharpening results safely.

The Sharpening Process Step-by-Step
Place the knife at the correct angle‚ apply light pressure‚ and stroke smoothly. Use a marker to track progress and adjust pressure as needed. Finish with honing for razor-sharp results.
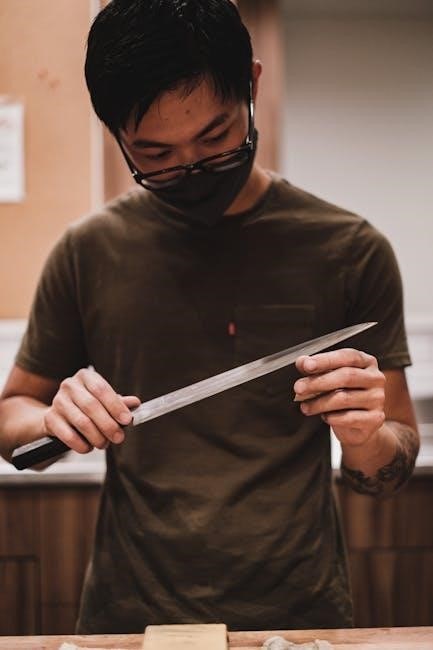
5.1 Holding the Knife at the Correct Angle
Holding the knife at the correct angle is crucial for effective sharpening. Place the blade on the whetstone at the desired angle‚ using a marker to visually track progress. Light pressure is key‚ increasing as needed for duller edges. Maintain consistent strokes‚ moving from heel to tip. For razor-sharp results‚ adjust pressure as the knife becomes sharper‚ ensuring even wear on the edge. This technique ensures a precise‚ even sharpening process every time.
5.2 Stroke Technique and Maintaining Consistency
A smooth‚ consistent stroke is vital for sharpening. Start with light pressure‚ increasing as needed for dull blades. Use a marker to track progress and ensure even wear. Perform 3-4 strokes per side‚ moving from heel to tip. Maintain the same angle throughout‚ adjusting pressure as the knife sharpens. Consistency ensures a uniform edge‚ while avoiding excessive strokes prevents over-sharpening. This method guarantees a sharp‚ reliable blade for any task.
Honing and Refining the Edge
Honing refines the knife’s edge by aligning and polishing it‚ ensuring sharpness and durability. Use a honing steel to maintain the blade’s edge between sharpening sessions for optimal performance.
6.1 The Difference Between Sharpening and Honing
Sharpening involves grinding metal to form a new edge‚ while honing polishes and aligns the existing edge. Sharpening creates a sharper blade by removing metal‚ whereas honing maintains sharpness by refining the edge. Both processes are essential for knife care‚ with sharpening done less frequently and honing used regularly to sustain blade performance and prevent dullness.
6.2 Using a Honing Steel to Maintain Sharpness
A honing steel‚ or sharpening steel‚ is used to maintain a knife’s edge by aligning and polishing the blade. Unlike sharpening‚ it doesn’t remove metal but refines the existing edge. To use it effectively‚ hold the knife at the same angle used for sharpening‚ typically around 20 degrees. Lightly draw the blade along the steel from heel to tip‚ repeating 3-4 times on each side. This process should be done weekly or before use to keep the knife in peak condition.
Tips for Achieving Razor-Sharp Results
Use a marker to track edge progress‚ adjust pressure during sharpening stages‚ and maintain consistent strokes. Keep the whetstone flat and use light strokes for the final edge.
7.1 Using a Marker to Check Edge Progress
Apply a permanent marker evenly along the knife’s edge. As you sharpen‚ the marker will show where the edge is being worn down. This visual guide helps ensure even sharpening and prevents over-sharpening. After a few strokes‚ inspect the edge to see if the marker is fading consistently. This method allows you to track progress and adjust your technique for a razor-sharp finish. It’s a simple yet effective way to monitor your sharpening process.
7.2 Adjusting Pressure for Different Stages of Sharpening
Apply heavier pressure during the initial sharpening phase to remove metal and establish the edge. As the knife becomes sharper‚ reduce pressure to avoid over-sharpening. Use light‚ gentle strokes during the final stages to polish the edge. Varying pressure ensures efficient sharpening while maintaining control‚ preventing damage‚ and achieving a razor-sharp finish. This technique helps adapt to the knife’s condition and desired sharpness level effectively.

Common Mistakes to Avoid
Using the wrong sharpening angle can lead to uneven edges. Apply consistent pressure and avoid over-sharpening. A marker can help track progress and maintain the correct angle.
8.1 Incorrect Angle Usage and Its Effects
Using the wrong angle can lead to a dull or uneven edge. If the angle is too shallow‚ the blade won’t sharpen effectively; too steep‚ and it may damage the knife. Over time‚ improper angles can create a wire edge or cause the blade to become misshapen. To avoid this‚ use a marker to track progress and maintain consistency. Guides or honing steels can help beginners master the correct angle for their knife type.
8.2 Over-Sharpening and How to Prevent It
Over-sharpening occurs when too much metal is removed‚ leading to a thin‚ weak edge that loses sharpness quickly. To prevent this‚ monitor the blade’s progress by checking its sharpness after each stroke. Use lighter pressure as the knife becomes sharper and avoid unnecessary strokes. Stopping once the desired sharpness is achieved is crucial. Additionally‚ using a marker to track the edge can help identify when further sharpening is unnecessary‚ ensuring the blade remains robust and functional.

Maintenance and Storage After Sharpening
Proper maintenance involves cleaning and drying the blade to prevent rust. Store the knife in a dry place‚ away from other utensils‚ to maintain sharpness. Regular honing with a steel can extend edge life and prevent dulling‚ ensuring the knife remains effective for future use.
9.1 Cleaning and Drying the Blade
Cleaning and drying the blade is crucial to prevent rust and maintain sharpness. Use a soft cloth to wipe away metal particles and debris. Ensure the knife is completely dry‚ especially along the edge‚ as moisture can cause corrosion. For added protection‚ apply a small amount of food-safe oil to carbon steel blades. Proper cleaning and drying are essential steps before storage to ensure the knife remains in optimal condition and ready for future use.
9.2 Proper Storage to Maintain Sharpness
Proper storage is vital to maintain a knife’s sharpness. Store the knife in a dry place‚ away from other utensils‚ to prevent accidental dulling. Use a protective sheath or blade guard to protect the edge. Avoid storing knives in a humid environment or near acidic materials‚ as this can cause rust. For long-term storage‚ apply a thin layer of food-safe oil to carbon steel blades to prevent corrosion. Proper storage ensures the knife remains sharp and ready for use.
Mastering knife sharpening with a whetstone requires understanding angles‚ grit‚ and technique. Consistent practice and patience will yield sharp‚ durable edges‚ enhancing your culinary and outdoor experiences.
10.1 Summary of Key Points for Effective Sharpening
Effective sharpening requires understanding proper angles‚ grit selection‚ and technique. Regular honing maintains sharpness‚ while consistent practice enhances skill. Proper pressure adjustment and blade inspection ensure optimal results. Always clean and store knives to preserve edges. Investing in quality tools and patience will yield durable‚ razor-sharp blades for culinary and outdoor use. Mastering these steps ensures efficient and long-lasting knife performance.