honeywell t4 pro install manual
Welcome to the Honeywell T4 Pro Installation Manual; This comprehensive guide provides step-by-step instructions for installing and configuring your programmable thermostat, ensuring safety, compatibility, and efficient setup.
Safety Precautions
Always power off the HVAC system before installation. Handle wiring carefully to avoid damage. Follow all safety guidelines to ensure a secure and proper thermostat setup.
Important Safety Information
Warning: Always disconnect power to the HVAC system before starting installation to prevent electrical shock or injury. Use appropriate tools and follow wiring instructions carefully. Ensure the thermostat is installed by a qualified technician if you are unsure. Avoid touching electrical components to prevent damage or harm. Keep the thermostat out of reach of children. Refer to local regulations for specific safety requirements. Proper installation ensures safe and efficient operation of your Honeywell T4 Pro thermostat.
Pre-Installation Requirements
Ensure your HVAC system is compatible with the Honeywell T4 Pro thermostat. Gather all necessary tools and materials. Verify system requirements before proceeding with installation.
Compatibility Check
Before installing the Honeywell T4 Pro thermostat, ensure your HVAC system is compatible. The T4 Pro works with most 24V AC heating, cooling, and heat pump systems. Verify compatibility by checking your system’s voltage and wiring configuration. The thermostat supports single-stage, multi-stage, and heat pump systems. Consult the product manual or Honeywell’s website for a detailed compatibility list. Proper compatibility ensures smooth operation and avoids installation issues. If unsure, contact Honeywell support for assistance. Correct compatibility is crucial for optimal performance and safety.
Tools and Materials Needed
To install the Honeywell T4 Pro thermostat, you will need a screwdriver, wire strippers, and a voltmeter for safe wiring. Additional materials include mounting screws, wall anchors, and wire connectors. Ensure you have a ladder or step stool for safe access to the wall. A pencil and drill may also be required for making holes. Gather all tools and materials beforehand to streamline the installation process. Proper preparation ensures a smooth and efficient setup of your thermostat.

Installation Steps
The installation process involves mounting the wallplate, wiring the thermostat, and attaching it securely. Follow the step-by-step guide for a seamless setup and proper functionality.
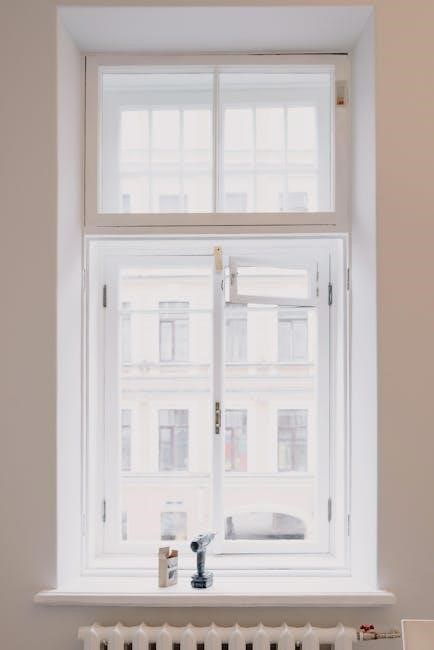
Mounting the Wallplate
Wiring the Thermostat
Ensure the power to your HVAC system is turned off before wiring. Separate the wallplate from the thermostat and remove the terminal cover. Connect the wires to the appropriate terminals, following the wiring diagram provided in the manual. Use a screwdriver to secure the wires tightly. Double-check all connections for accuracy and ensure no wires are loose. Replace the terminal cover and proceed to attach the thermostat to the wallplate. Proper wiring is critical for safe and efficient operation of the Honeywell T4 Pro thermostat.
Attaching the Thermostat to the Wallplate
Once the wiring is complete, align the thermostat with the wallplate, ensuring it fits securely. Gently push the thermostat onto the wallplate until it clicks into place. Use the provided screws to tighten and secure the thermostat firmly. Verify that the device is level and properly aligned. Double-check the connections to ensure they are not pinched or damaged. A secure attachment is essential for proper functionality and to prevent any operational issues with the Honeywell T4 Pro thermostat.
Initial Setup
Power on the thermostat, navigate the menu to set date, time, and basic configurations. Ensure the system is operational and ready for advanced settings.
Powering On the Thermostat
After completing the installation, press and hold the center button to power on the thermostat. The screen will light up, indicating successful activation. Ensure the system is properly connected to your HVAC. Use the Plus or Minus buttons to navigate through the initial menu. Enter the default passcode (1234) if prompted for secure access. Verify the system status and ensure all features are operational. If issues arise, refer to the troubleshooting section or contact Honeywell support for assistance.
Navigating the Menu
Use the Plus (+) and Minus (-) buttons to scroll through menu options. Press Select to choose an option. The default passcode (1234) may be required for advanced settings. Access scheduling, system settings, and energy-saving features. Navigate to “Installer Settings” for professional configurations. Use the Back button to return to the previous screen. Ensure all settings are saved before exiting. Refer to the on-screen prompts for guidance. This intuitive interface streamlines thermostat setup and daily operation, ensuring optimal performance and energy efficiency.
Advanced Configuration
Access installer settings by pressing and holding the CENTER and buttons for 3 seconds. Customize parameters like passcodes and system settings for enhanced control and security.
Accessing Installer Settings
To access advanced installer settings on the Honeywell T4 Pro, press and hold the CENTER and buttons simultaneously for approximately 3 seconds. This action will unlock the advanced menu, allowing you to navigate through various configuration options. Use the navigation buttons to scroll through parameters such as passcode settings, temperature limits, and system operation modes. These settings are essential for customizing the thermostat to meet specific installation requirements and ensuring optimal performance.
Setting Up a Passcode
Setting up a passcode on the Honeywell T4 Pro ensures secure access to advanced settings. The default passcode is 1234. To change it, enter the current passcode using the Plus or Minus buttons, then press Select. Navigate to the passcode option and input your new 4-digit code. Confirm by pressing Select to save. This feature prevents unauthorized changes, maintaining your preferred settings. Remember to store the passcode securely for future adjustments.
Scheduling and Programming
The Honeywell T4 Pro allows you to create custom schedules for your heating and cooling system, optimizing energy usage and comfort. Access the menu, select scheduling options, and set temperatures for different times and days. Program up to six periods daily and choose between 5/2 or 7-day schedules. This feature ensures your home is comfortable when needed while saving energy when unoccupied, providing an ideal balance between efficiency and convenience.

Troubleshooting Common Issues
Check the display for error codes and verify wiring connections. Reset the system if necessary. Refer to the error code list or contact Honeywell support for assistance.
Common Issues and Solutions
Common issues include a blank display, wiring problems, or incorrect passcode entry. Check the circuit breaker or power source if the display is blank. Verify wiring connections and ensure they match the system requirements. If the passcode is forgotten, reset it using the default code (1234) or perform a system reset. For error codes like E1, E2, or E30, consult the error code list in the manual or contact Honeywell support for assistance. Regularly updating the system and ensuring proper installation can prevent many issues.
Understanding Error Codes
Error codes like E1, E2, or E30 indicate specific issues with your Honeywell T4 Pro thermostat. E1 often relates to wiring problems, while E2 may signal sensor malfunctions. E30 typically indicates communication errors between the thermostat and the system. Refer to the manual for a full list of codes and their meanings. Troubleshoot by checking connections, ensuring proper installation, and resetting the system if needed. If issues persist, contact Honeywell support for further assistance or professional help.
Maintenance and Care
Regular maintenance ensures optimal performance of your Honeywell T4 Pro thermostat. Clean the display and sensors with a soft cloth to prevent dust buildup. Check and replace batteries annually if applicable. Inspect wiring connections for corrosion or damage. Update software periodically for enhanced functionality. Schedule annual HVAC system checks to maintain compatibility. Proper care extends the lifespan and efficiency of your thermostat, ensuring accurate temperature control and reliable operation year-round.
Thank you for following the Honeywell T4 Pro installation manual. This guide has provided comprehensive instructions to ensure a smooth and successful setup. By adhering to the steps outlined, you’ve optimized your thermostat for efficient performance and reliable operation. For any unresolved issues, refer to the troubleshooting section or contact Honeywell support. Proper maintenance and regular updates will keep your system running at its best. Enjoy the convenience and energy savings offered by your Honeywell T4 Pro programmable thermostat.
Additional Resources
For further assistance, download the Honeywell T4 Pro manual or visit their official website for detailed guides and troubleshooting tips. Contact Honeywell support at 1-800-645-7490 for professional help.
Downloading the Manual
To access the Honeywell T4 Pro installation manual, visit the Honeywell Home website. Navigate to the support section, select your thermostat model, and download the PDF. Ensure compatibility with your device and refer to the manual for detailed installation steps, wiring diagrams, and troubleshooting guides. This resource is essential for a successful setup, providing clear instructions and visual aids to simplify the process. Regularly check for updates to ensure you have the latest version.
Online Support and Assistance
Honeywell offers comprehensive online support for the T4 Pro thermostat. Visit their official website for FAQs, troubleshooting guides, and video tutorials. Live chat with experts or contact customer service for personalized assistance. Additionally, downloadable resources like user manuals and wiring diagrams are available to aid in installation and setup. This dedicated support ensures a smooth experience, addressing any challenges you may encounter during or after installation.

Final Post-Installation Checks
After installation, ensure the thermostat functions correctly. Test heating, cooling, and fan modes. Verify the display lights up and schedules are set properly for optimal performance.
Ensuring Proper Functionality
To ensure the Honeywell T4 Pro operates correctly, check all wired connections for secureness and accuracy. Power on the thermostat and verify the display lights up. Test each mode—Heat, Cool, and Fan—to confirm they activate properly. Set a basic schedule and monitor temperature changes to ensure accuracy. If any issues arise, review wiring or consult troubleshooting guides. Proper functionality ensures energy efficiency and consistent comfort in your home environment.
Testing the System
After installation, turn on the Honeywell T4 Pro and test all system functions. Check heating, cooling, and fan modes to ensure proper operation. Verify temperature accuracy by comparing the display with a separate thermometer. Test scheduling features by setting a basic program and observing temperature changes. Ensure the thermostat responds correctly to manual adjustments. If issues arise, review wiring connections and consult the troubleshooting section. System testing confirms everything works as intended, providing reliable performance and comfort.
Common questions about the Honeywell T4 Pro include installation steps, system compatibility, and troubleshooting. Users often inquire about wiring, passcode setup, and scheduling features. Many ask how to access advanced settings and resolve error codes. Others seek guidance on maintenance and optimizing energy efficiency. These FAQs address typical concerns, ensuring a smooth experience with the Honeywell T4 Pro programmable thermostat.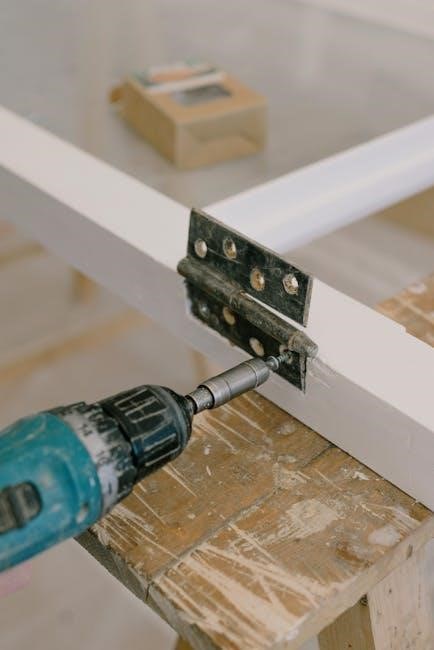
Frequently Asked Questions